
This week has flown by for me! I had planned on blogging the rest of my visit here in Detroit with Judith, but time just got away! I need to finish that up so I don't forget all the details I want to remember.
Last weekend, David's aunt, who lives on Lake Michigan {on the west side of the state} came for an overnight visit, and my parents are coming for a week in September. I have been busy readying our guest room in preparation for their visit. I am also super excited about going back home to Arkansas for three glorious weeks in September. I know Harbor and I will miss David horribly, but it will be good to get back down south where the cows and horses roam and the sweet tea runs freely {and the grass is greener, of course.} I really am falling in love with Detroit, but someone once said there is no place like home. So true, Dorothy, girl. : )
Thanks to all who have been voting in the little poll above. It has been fun to see why you stop by and visit. I'm so intrigued by blogs and what makes one blog jump out at me and not another. Hearing what you like to see when you come visit makes it fun!
Today I wrapped up another wreath. I know... another wreath! Tired of wreaths yet? : ) I couldn't find anything to buy that I liked or any tutorials that really nailed what I wanted, so I kind of ran with my own theme. I really like the look- very soft and elegant and full of detail.
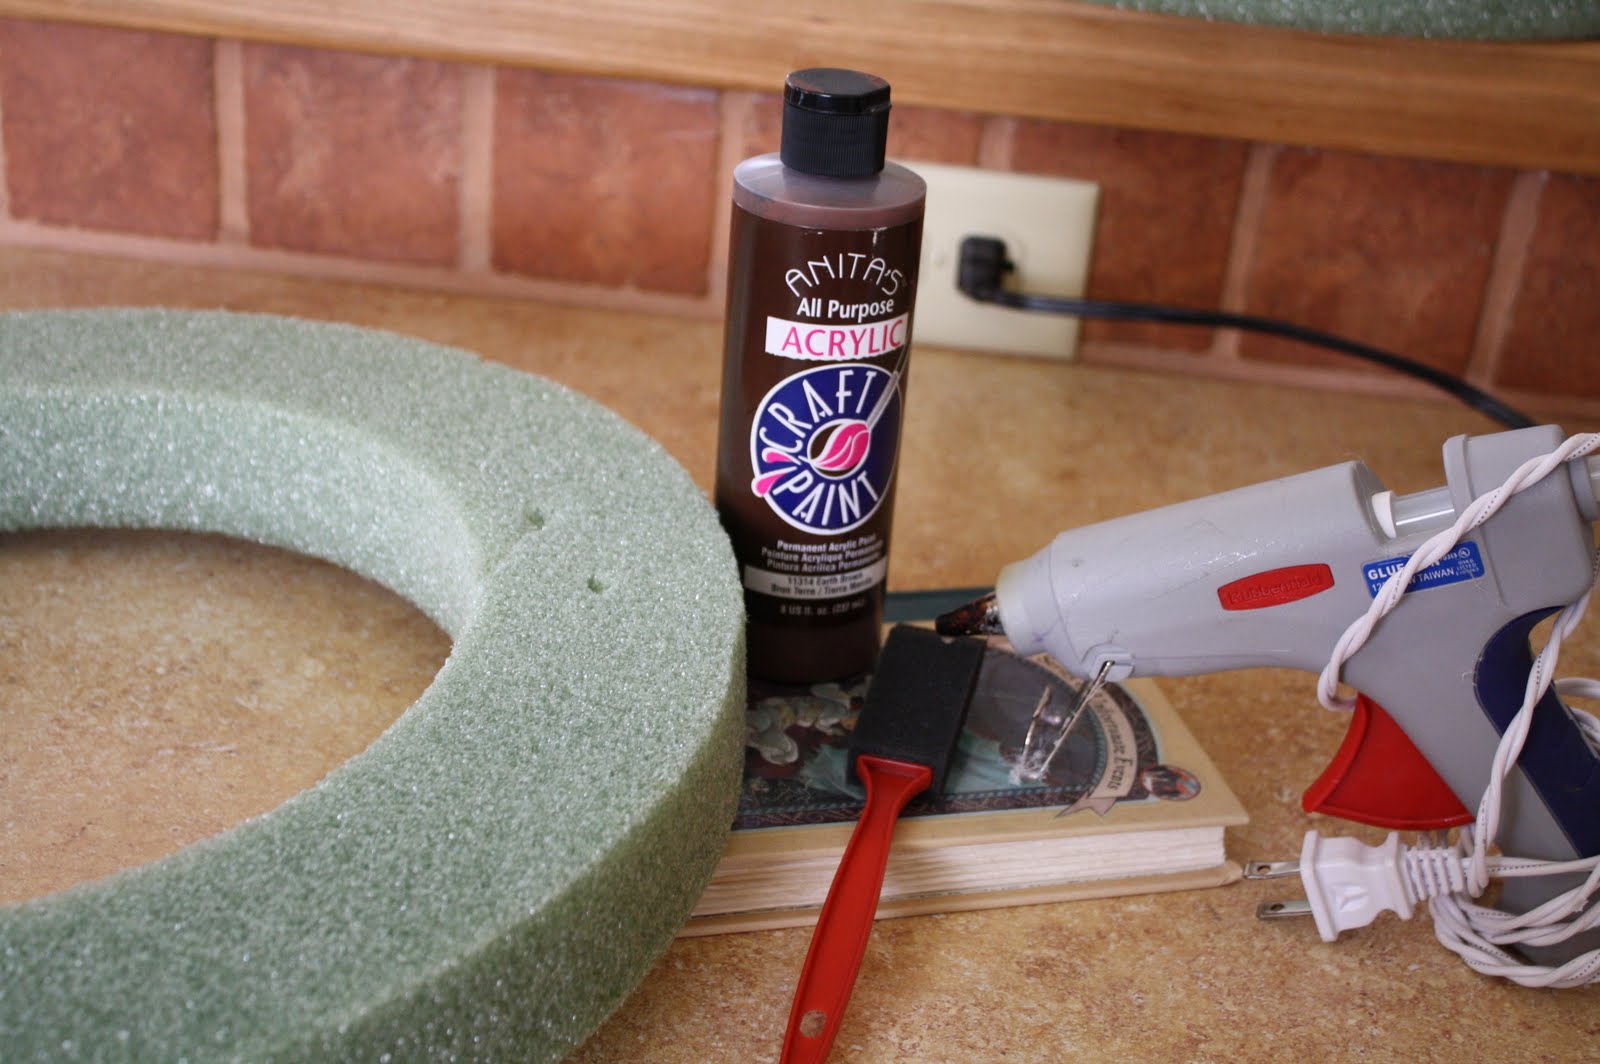
You will need:
1 foam wreath form {mine was flat on the backside for easy hanging}
long strips of neutral colored fabric
{sewing machine for a ruffle, but that could be optional}
a chapter book that no one will miss
brown craft paint and a small paint brush
scissors
lots and lots of hot glue
{and maybe a movie because this wreath took me forever to finish!}
Start by painting the sides of the book with craft paint. This will help to age the book. I really felt bad about tearing up a good book, being an English teacher and what not, but find something you won't feel sad tearing up {because you will trash this book by the end!}


I alternated between using 3, 2, and single pages to create my roses. For the larger roses, I used three sheets stacked on top of one another.

Trim off the edges and make them round, keeping them stacked together the whole time.

Starting at the outside edge, cut a circular snake shape round and round in the middle until you come to the end. Leave a round circle in the middle.

Ignore the middle. You will come to that circular shape in the middle at the end of the flower rolling. Start on the outside edge and roll the flower in the direction you cut it. I like to pinch it with a finger on top and bottom with one hand and feed the paper through with the other.

When you finish rolling, if you have done it correctly, you will find that circle shape. Use hot glue to glue the circular shape to the bottom of the flower. Use lots of glue and glue multiple layers. This is what will hold your flower together.

This is what that flower looked like once it had dried for a few seconds. Alternate between 3, 2, and single sheets to make smaller and larger flowers. The tighter you roll them, the more control you will have over their shape. A loose roll will you give a very large, relaxed flower.

Be prepared for this to take forever. I rolled flowers for a good two hours or so over the course of two days. I just piled them up in the center of the wreath and rolled a few before dinner, after bedtime for Harbor, etc..


Once you have 20 flowers or so, stop and wrap your foam wreath in the fabric you chose. Use hot glue to secure at the ends, but leave the center free of glue to give it a loose, relaxed feel.


Take a flower and hot glue it to the wreath. Nestle the flowers closely and look for open holes. I made several small, tight roses to fill in the open gaps.


Decide where you want to attach another strip of fabric to use for hanging. Use a small bit of glue to secure it and keep adding flowers.


I didn't want to completely cover my wreath with flowers, so I used my sewing machine to make a ruffle. Using the longest and loosest stitch on your machine, sew right down the middle.
{If you are not a sewer, just skip this part. It will still look perfect. : ) }

I decided on a small section of the wreath for the ruffle and hot glued it on by putting glue just on the ends.

And I decided to hang it in my living room over a large painting behind our arm chair. It was a bit boring over there and somewhat dark, so this light colored wreath adds some interest. You could even read chapters 1-11 of Lemony Snicket's, A Series of Unfortunate Events, if you looked closely enough. : )
And as a shout out to my sweet mother, notice my leather ottoman is missing? I mailed a few yards of fabric to my mom and she sewed a beautiful pleated slip cover for our ottoman. I just didn't trust myself to do it.
I love it! I can wash it {I have already once when Harbor decorated it with green crayon. Lovely.} and it totally changes the whole feel of the living room. I love slipcovers.

So, back to my "Trash the Book" wreath... it just fits in like a long lost friend in this house. My style is really eclectic with vintage, modern, and lots of whimsy coming together at every turn. So things like this shabby chic wreath just sort of blend in and look good, I think.


If you make one, let me know. I'd love to see it. I imagine they are a bit like snowflakes.. no two alike. : )

I've also added a "tutorial" link at the top to find these projects more easily. Since a few of you were interested, I thought it might keep things a little more organized over here.
Have a great rest of the week!
Oh,such a cute wreath. I just love those flowers out of book pages. I'm really surprized you tore pages out of a book thats so unlike you,ha!!! But hey, you need supplies for a craft project & that I understand. Too much hot glue for me thru, I don't ever see myself making that because of all the hot glue, I always burn my fingers. The ottman cover looks good, so glad you liked it. And its looks like it was just in time with Harbor & his littl green friend. Miss & love you guys...Mom
ReplyDeleteOh I REALLY like that wreath! Your living room has such a cozy, welcoming glow. I would love to try to make one...maybe when school starts back in a few weeks and things are (a little) less wild around here. :)
ReplyDeleteThree weeks in AR--that will be fun! We just got back from visiting parents and you're right..."no place like home".
Ok, I am going to start emailing you pics of my house and I want you to decorate it from afar... I wish I had an ounce of your talent girl! And I am SO loving your decorating tutorials! Please don't stop! :)
ReplyDeleteOh and I am SO excited that your parents are coming to visit and that you get to come back to Arkansas for a few weeks! And what a great time to come back for a visit! Hopefully this dreadful heat will be much cooler by then! :)
ReplyDeleteThat is the coolest thing I have ever seen. It is beautiful! You are amazing! Your house looks awesome! I am with Suz, you've got a lot of talent!
ReplyDeleteLove Love!! I wish I was patient enough to make this wreath!
ReplyDeleteI love this idea. I have been noticing a lot of art centered around "trash the book" concepts. I enjoy books so much and like being around them that this would be a great craft idea to do for my home. I'm going try it next week. Thanks, Jessica.
ReplyDeleteLove that wreath!! I love the looks of the room!
ReplyDelete